User Guides - G2.0 Gloworm Lights
The following User Guide is specific for the G2.0 range of products:
G2.0 Gloworm Lights are designed to be used in the harshest of conditions. However, their performance will vary depending on the exact situation and environmental influence. It is recommended that a spare light source is carried at all times to ultimately ensure your safety.
G2.0 Gloworm Lights are manufactured for specific activities and should be used only on completion of reading this User Guide.
As with any product designed to be used in the outdoors, Gloworm Lights present their own risks when in use:
>> Lights are designed to be moving when being used for extended periods. Failure to do so may result in the housing of the light becoming hot and light intensity decreasing.
>> Do not look directly into the light or shine the light directly at others. This could result in disorientation or eye damage.
>> When USB ports/connectors are connected the system is waterproof to IP67. However, it is advised that products are not submerged.
>> The USB Fast Charger is not designed for outdoor use. It should always be used indoors.
>> The light will emit a warning flash (5 flashes) when the Power Pack is at low capacity. Soon after the light will stop.
>> It is advised that the battery be disconnected from the light after use. The electronics will use a small amount of power and eventually discharge the battery OR the light may be switched on accidentally.
>> USB ports/connectors, when not connected, are sensitive to moisture. If ports/connectors are connected when wet, the light will protect itself by not operating. The port/connector will need to be dried in order for the light to operate.
The following User Guide is for Gloworm G2.0 Lights released in 2021. The user guide is applicable to the following models:
>> Gloworm X2 (G2.0)
>> Gloworm X2 Adventure (G2.0)
>> Gloworm XS (G2.0)
>> Gloworm XS Adventure (G2.0)
>> Gloworm XSV (G2.0)
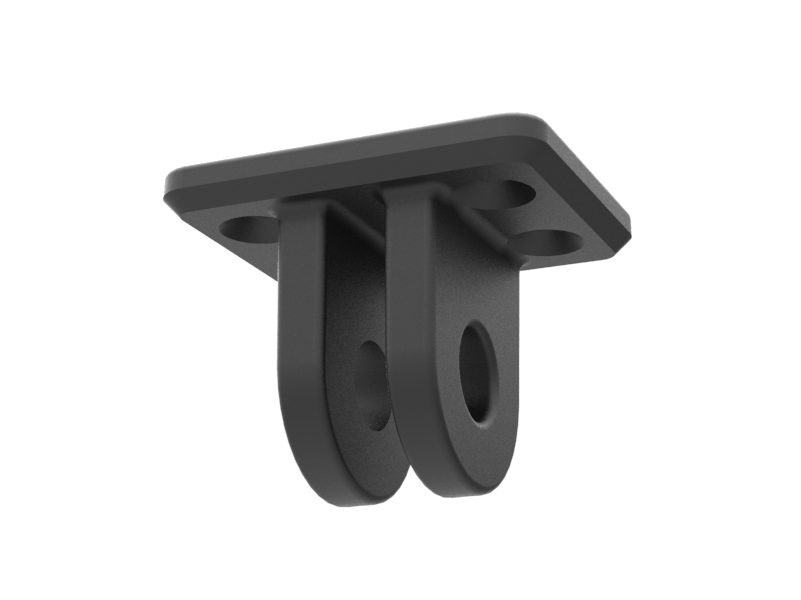
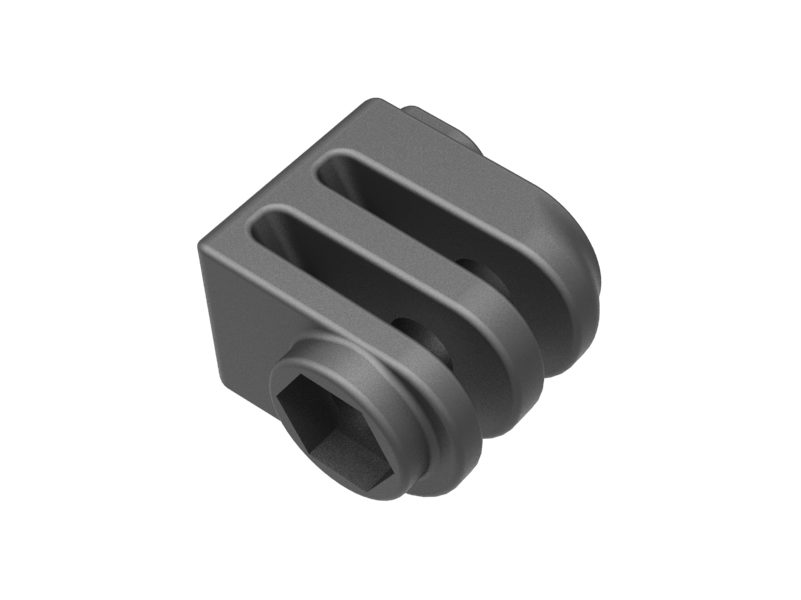
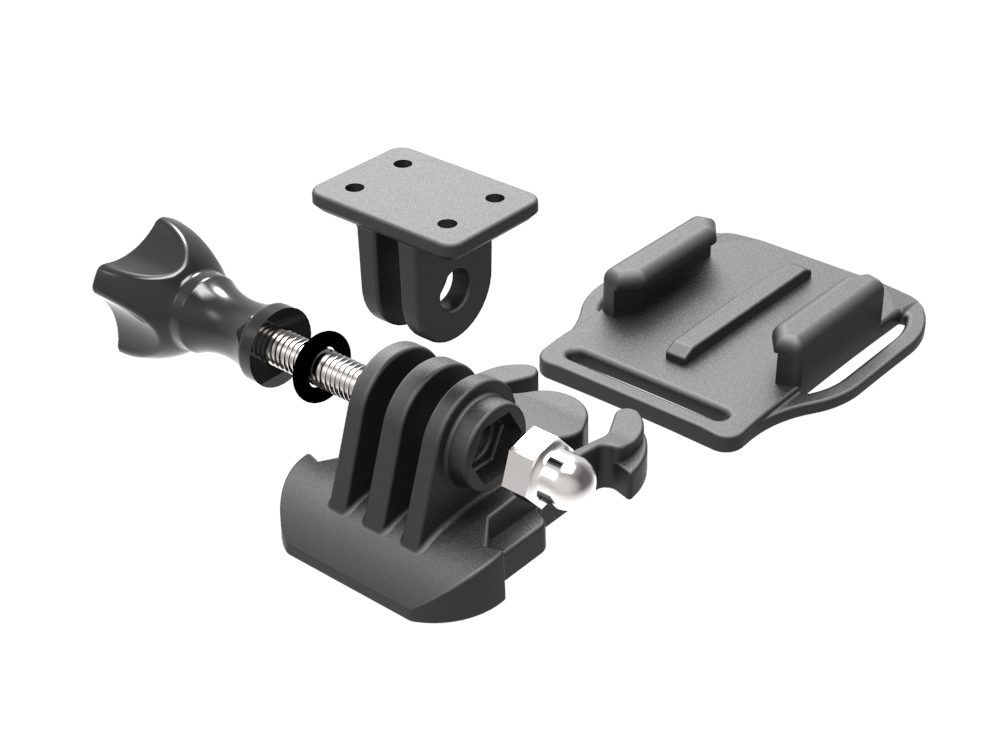
Universal Light Mount - Attaches to light, interface for the Universal Helmet Mount
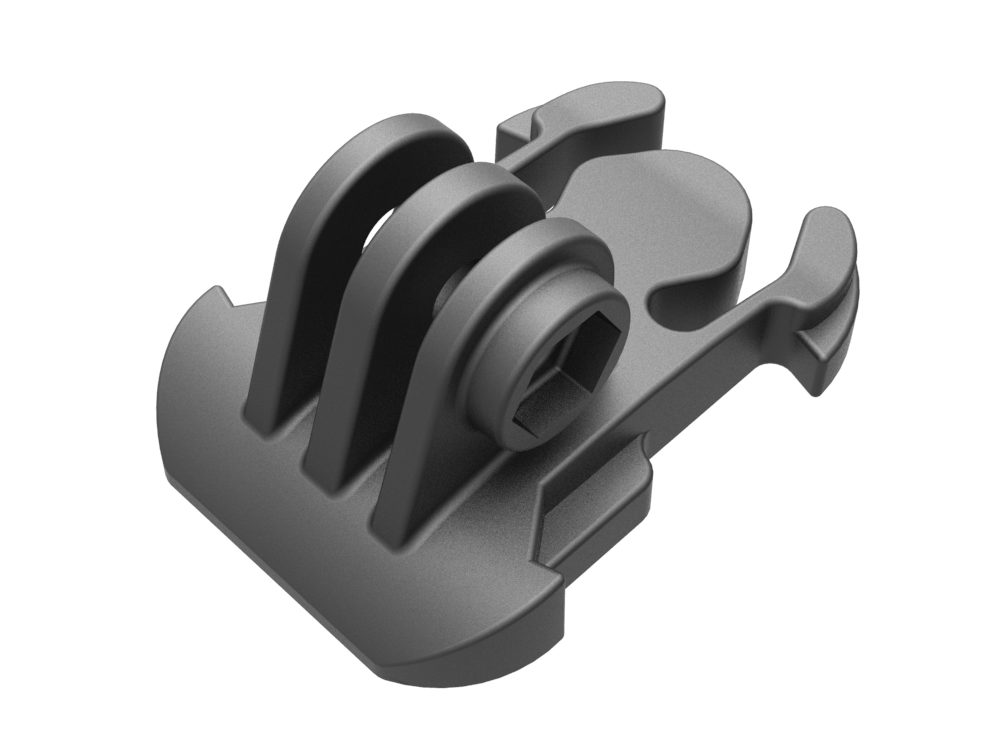
Universal Helmet Mount - Slides into the Base Plate. Mates with Universal Light Mount
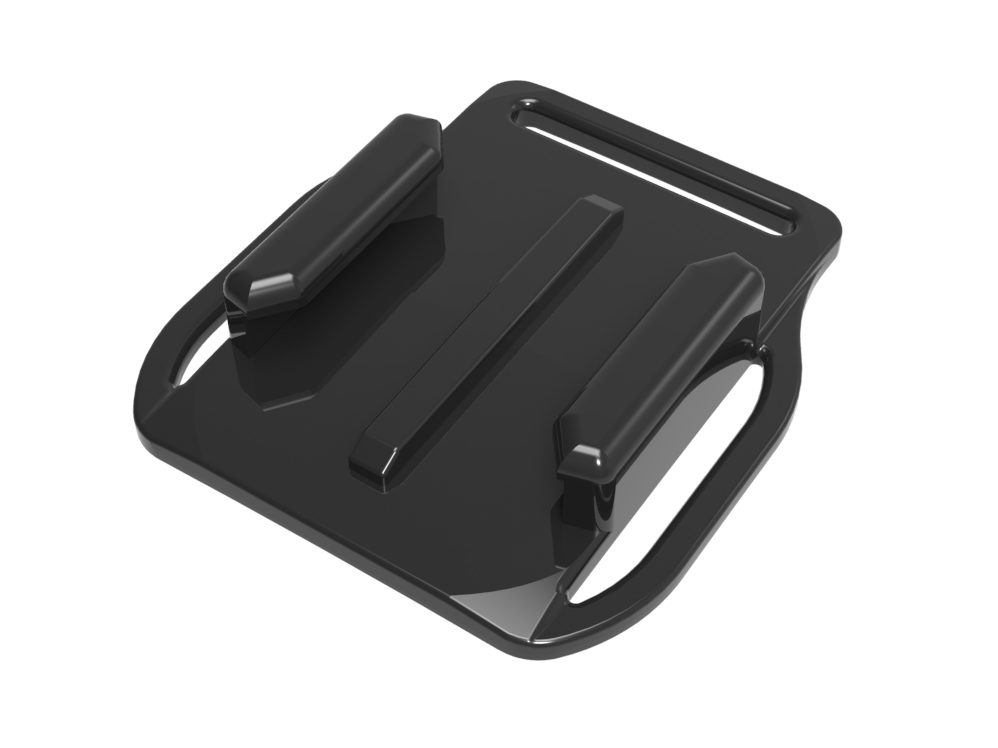
Base Plate - Attaches to helmet using supplied velcro. Interface for Universal Helmet Mount
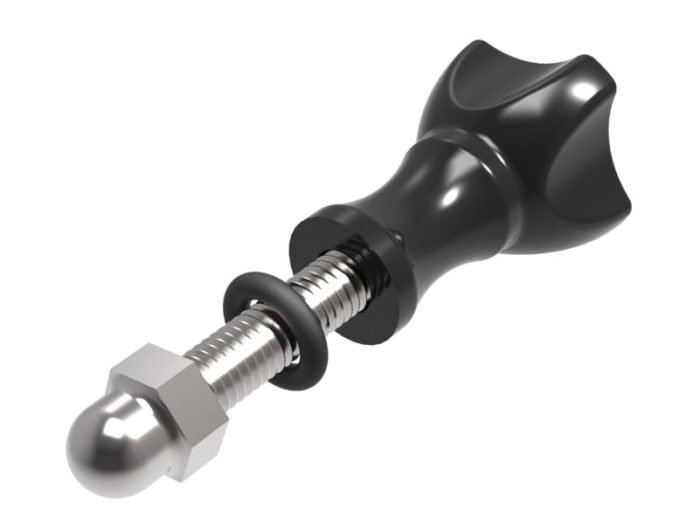
Thumb Screw - Holds Universal Helmet Mount and Universal Light Mount together
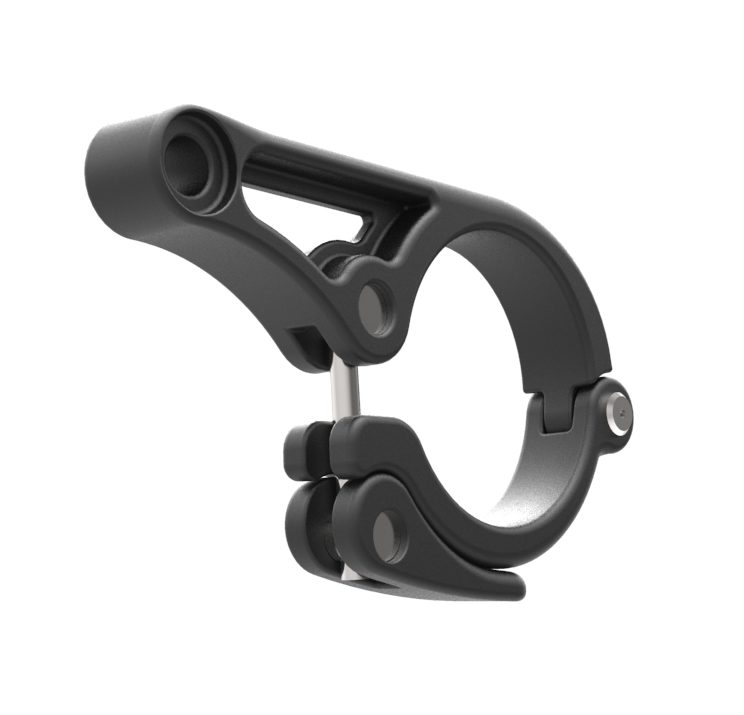
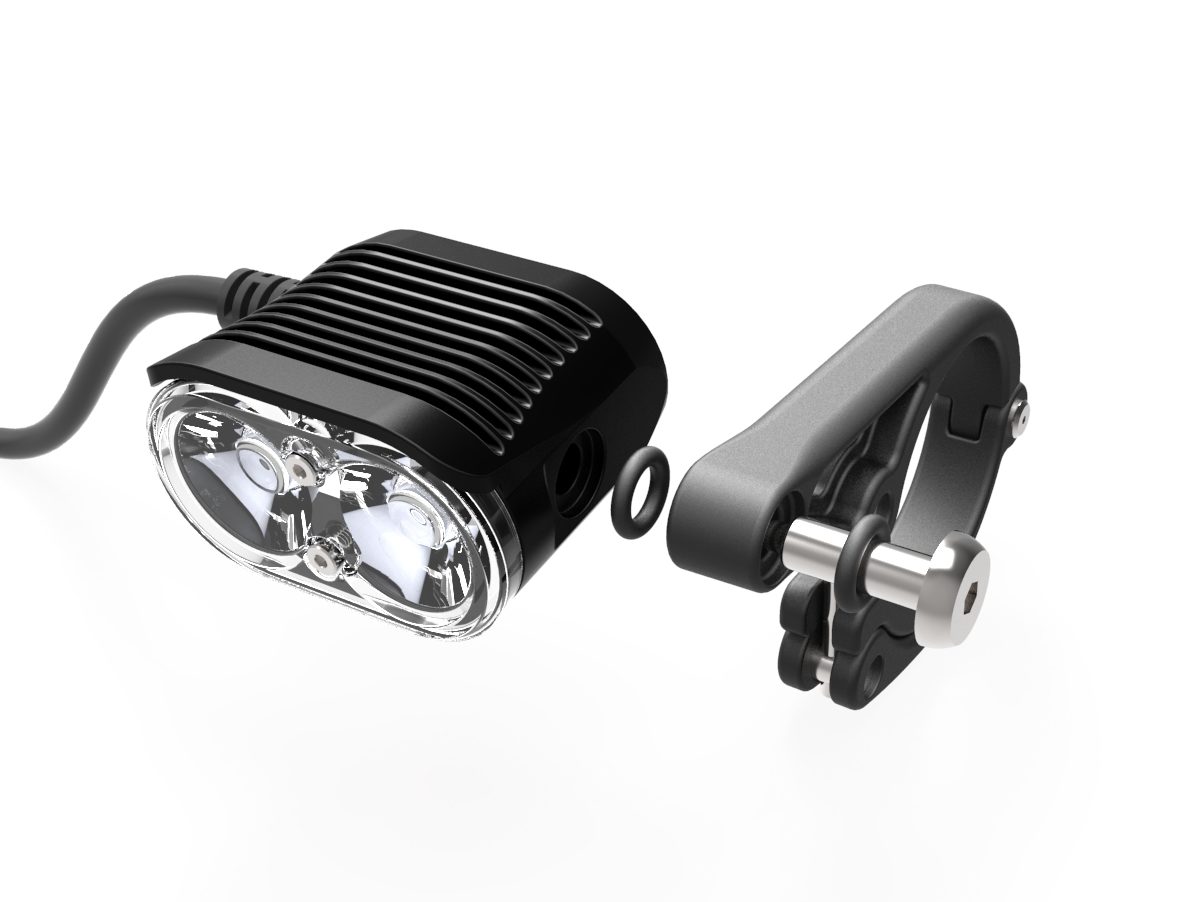
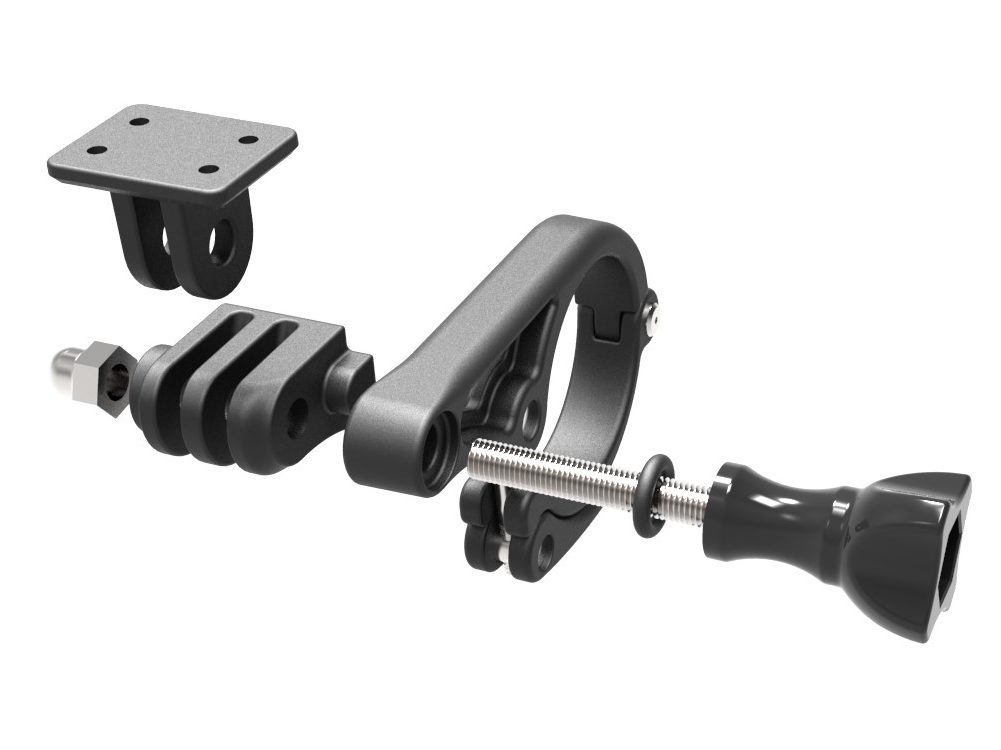
Quick Release Bar Mount - Mated with the Light Pivot Bolt, mounts light to bar
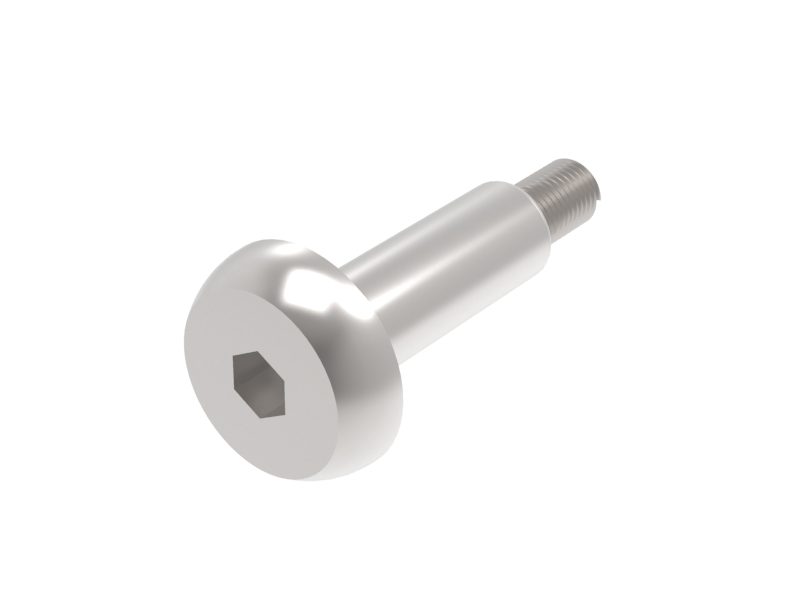
Light Pivot Bolt - Used in conjunction with two o-rings, secures light to the Quick Release Bar Mount
Universal Bar Mount (Optional Extra) - Can be mated to Quick Release Bar Mount with Thumb Screw as a bar mount option using the Universal Light Mount
>> Attach Base Plate to Helmet using supplied velcro
>> Secure Universal Light Mount to light using supplied screws
>> Mate Universal Light Mount to Universal Helmet Mount using Thumb Screw, then tighten
>> Slide Universal Helmet Mount into Base Plate
>> Adjust angle of light to suit
>> Attach Quick Release (QR) Bar Mount to bar, ensuring it is tight enough that it does not rotate. For 31.8mm bars, use the supplied adapter shim
>> Slide Light Pivot Bolt into the QR Bar Mount. There should be one o-ring on either side of the mount.
>> Mate light to mount by threading the Light Pivot Bolt into the thread on the side of the light. Tighten until the light can still be turned but won't move while riding. (Torque 4.5 Nm)
>> Adjust angle of light to suit
>> Secure Universal Light Mount to light using supplied screws
>> Mate Universal Light Mount to Universal Bar Mount
>> Slide Thumb Screw through the QR Bar Mount then the Universal Bar Mount/Light Mount
>> Tighten to ensure light does not rotate while riding
>> Adjust angle of light to suit
The main components required to operate a G2.0 Gloworm Light are:
>>Light head
>>TX Remote
>>Power Pack
>>Power Cable
>>Mount (for helmet, handle bar or headstrap)
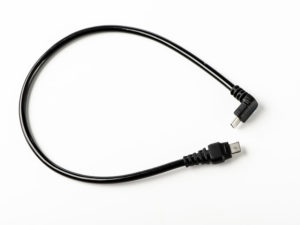
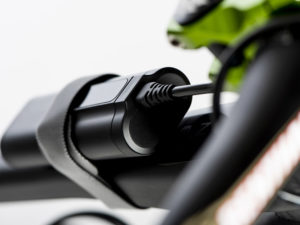
>> Gloworm G2.0 Lights are three part systems. Light, Power Pack and Power Cable. The Light and Power Pack are connected using the provided USB-C Power Cable (available in 3 lengths - regular, long, x-long).
>> The system is designed to be connected using the Power Cable once the Light and Power Pack have been mounted in the desired positions. This approach enables mounting without the inconvenience of cables getting in the way.
>> When connected, the system can be operated using the button on the light or TX Remote (if paired).
The USB-C Power cable is unique to Gloworm. By using USB-C, Gloworm Lights can be more efficient, less cumbersome and more versatile.
The light system when connected is fully waterproof and robust, however care must be taken when removing the USB-C cable in wet conditions.
Moisture will not damage the port or the cable, but the electronics will not operate until connectors/ports are dry.
>> Ensure the cable ends are kept as dry as possible and free of debris
>> Ensure debris and moisture do not enter the USB-C port on the light or power pack
>> If a port or connector does get wet, usually a quick shake or shot of compressed air will dry it sufficiently.
>> Ensure the connector o-ring is in place before connecting the cable to light or power pack.
When connected to the Power Pack, the light can be operated using the button on the back of the light OR, if paired, a TX (BT) Remote (See TX Remote section for details).
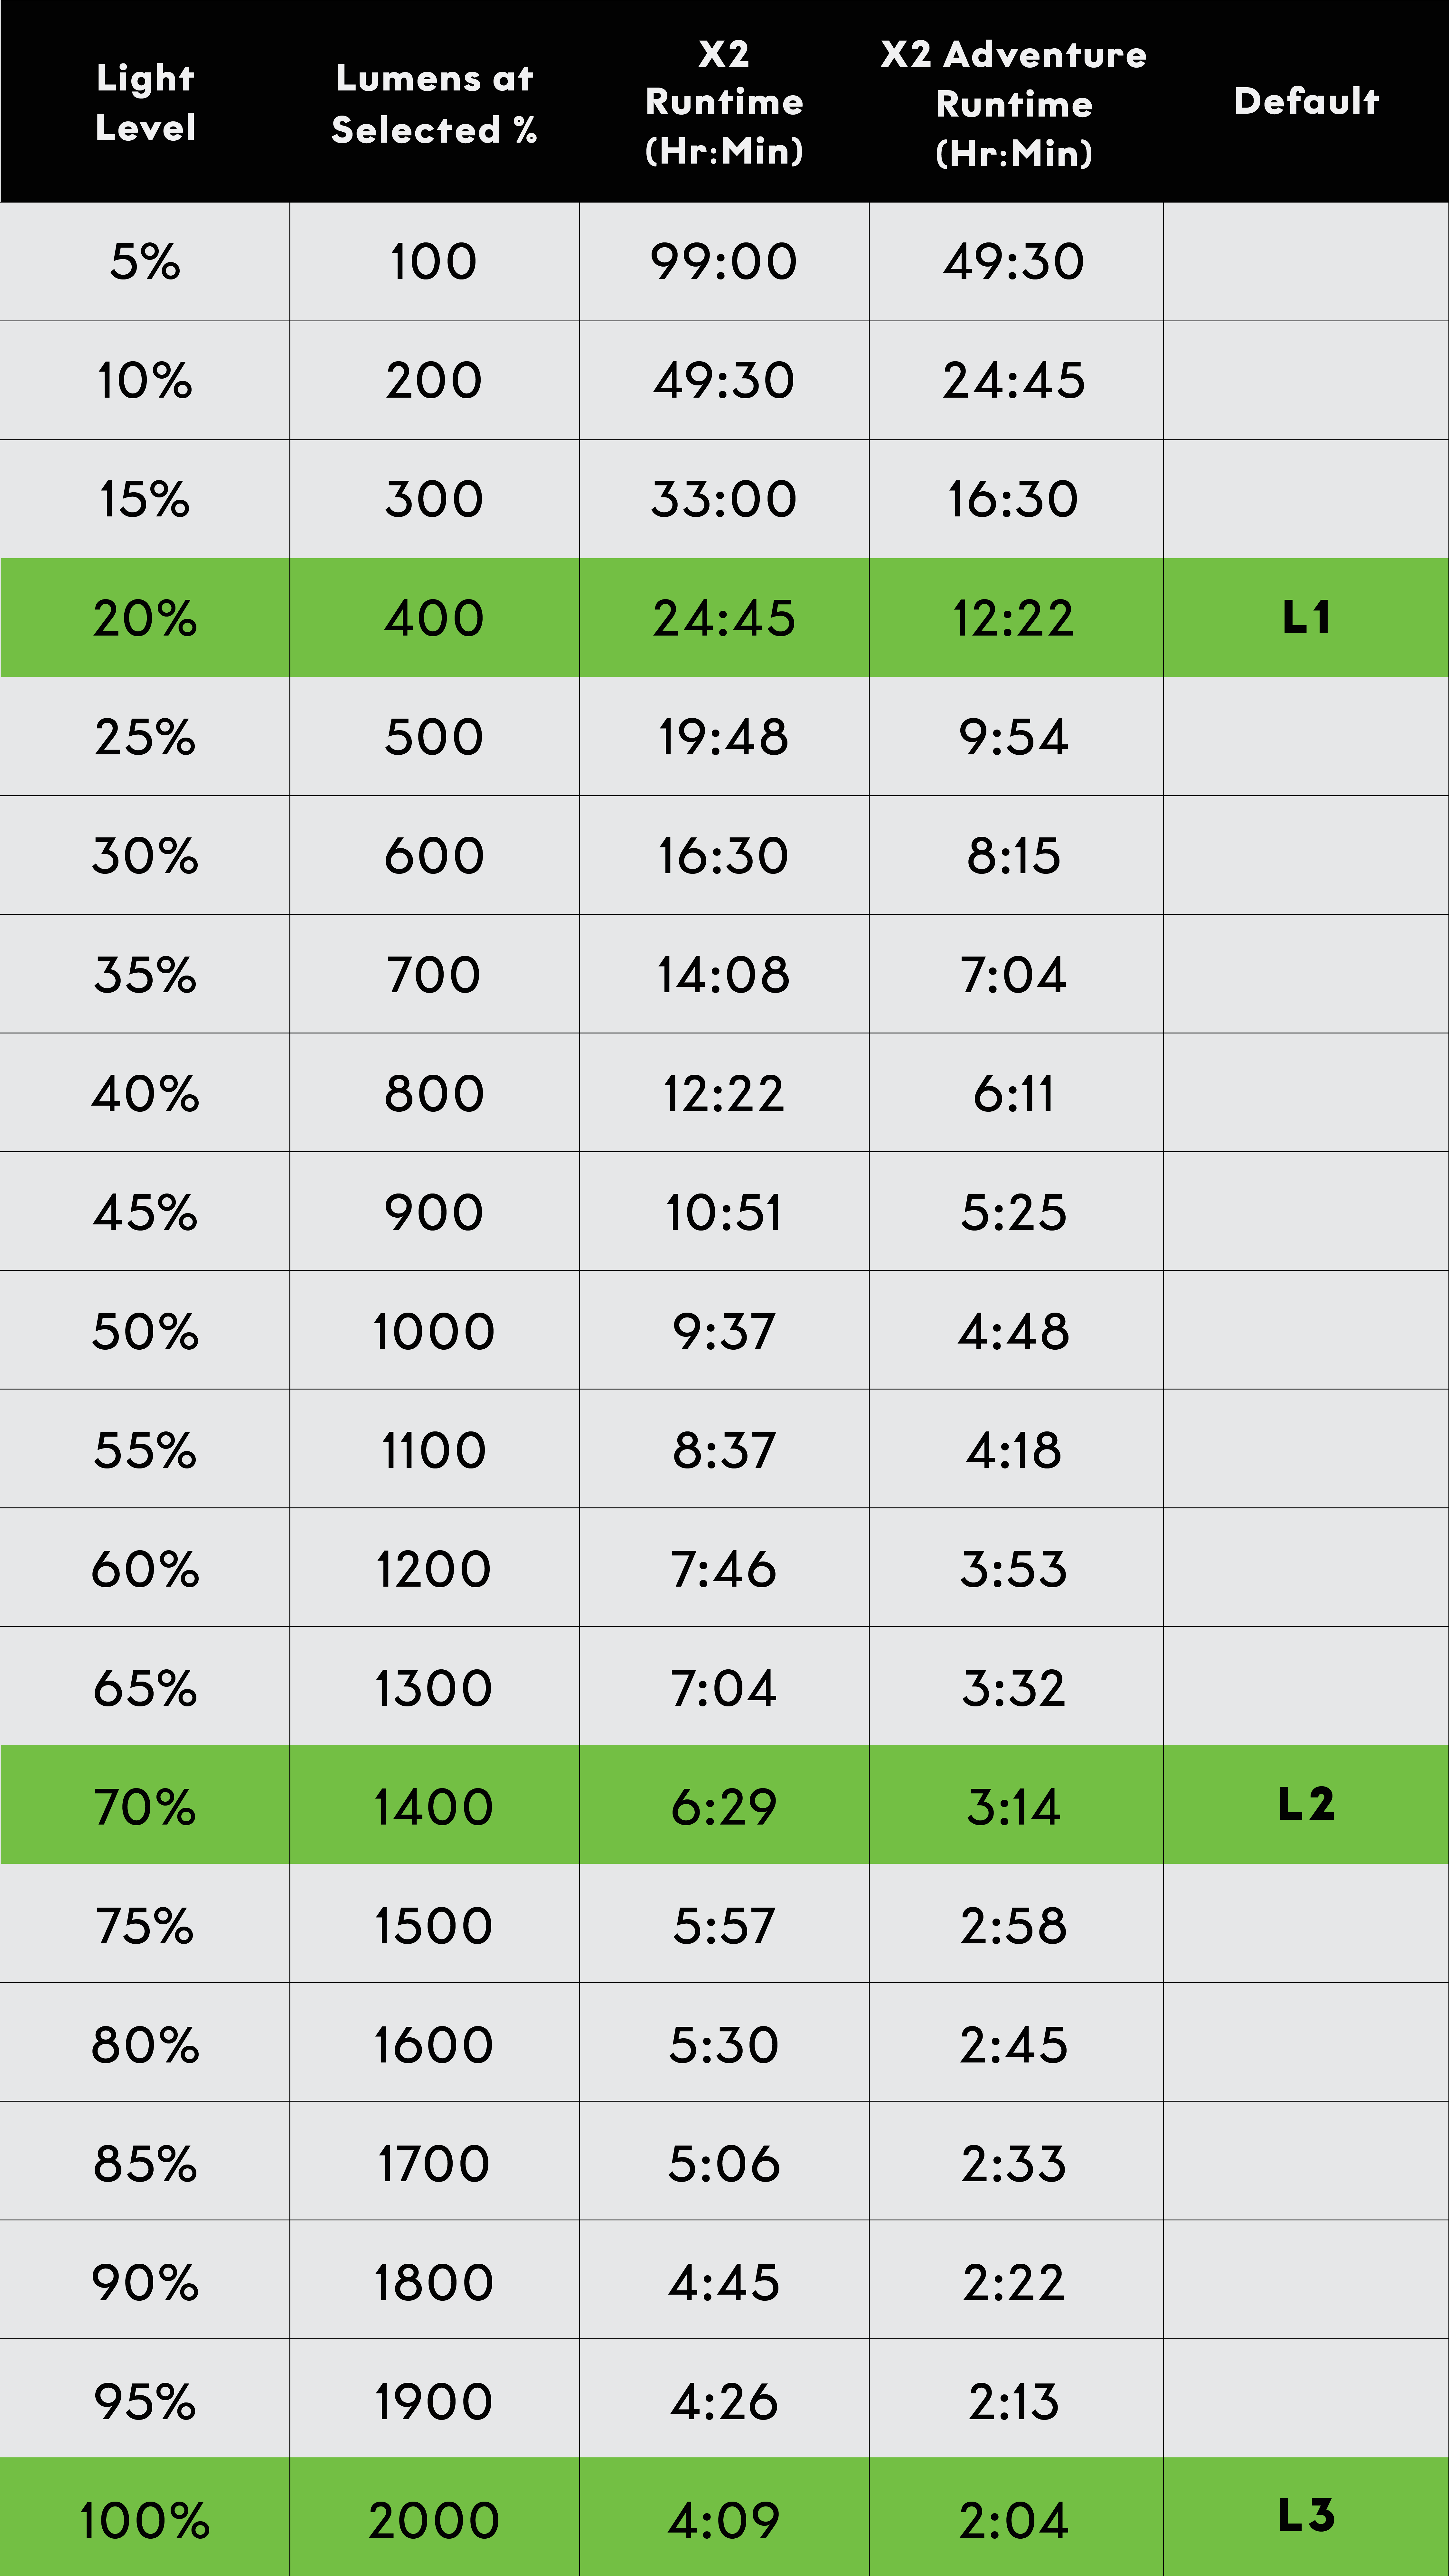
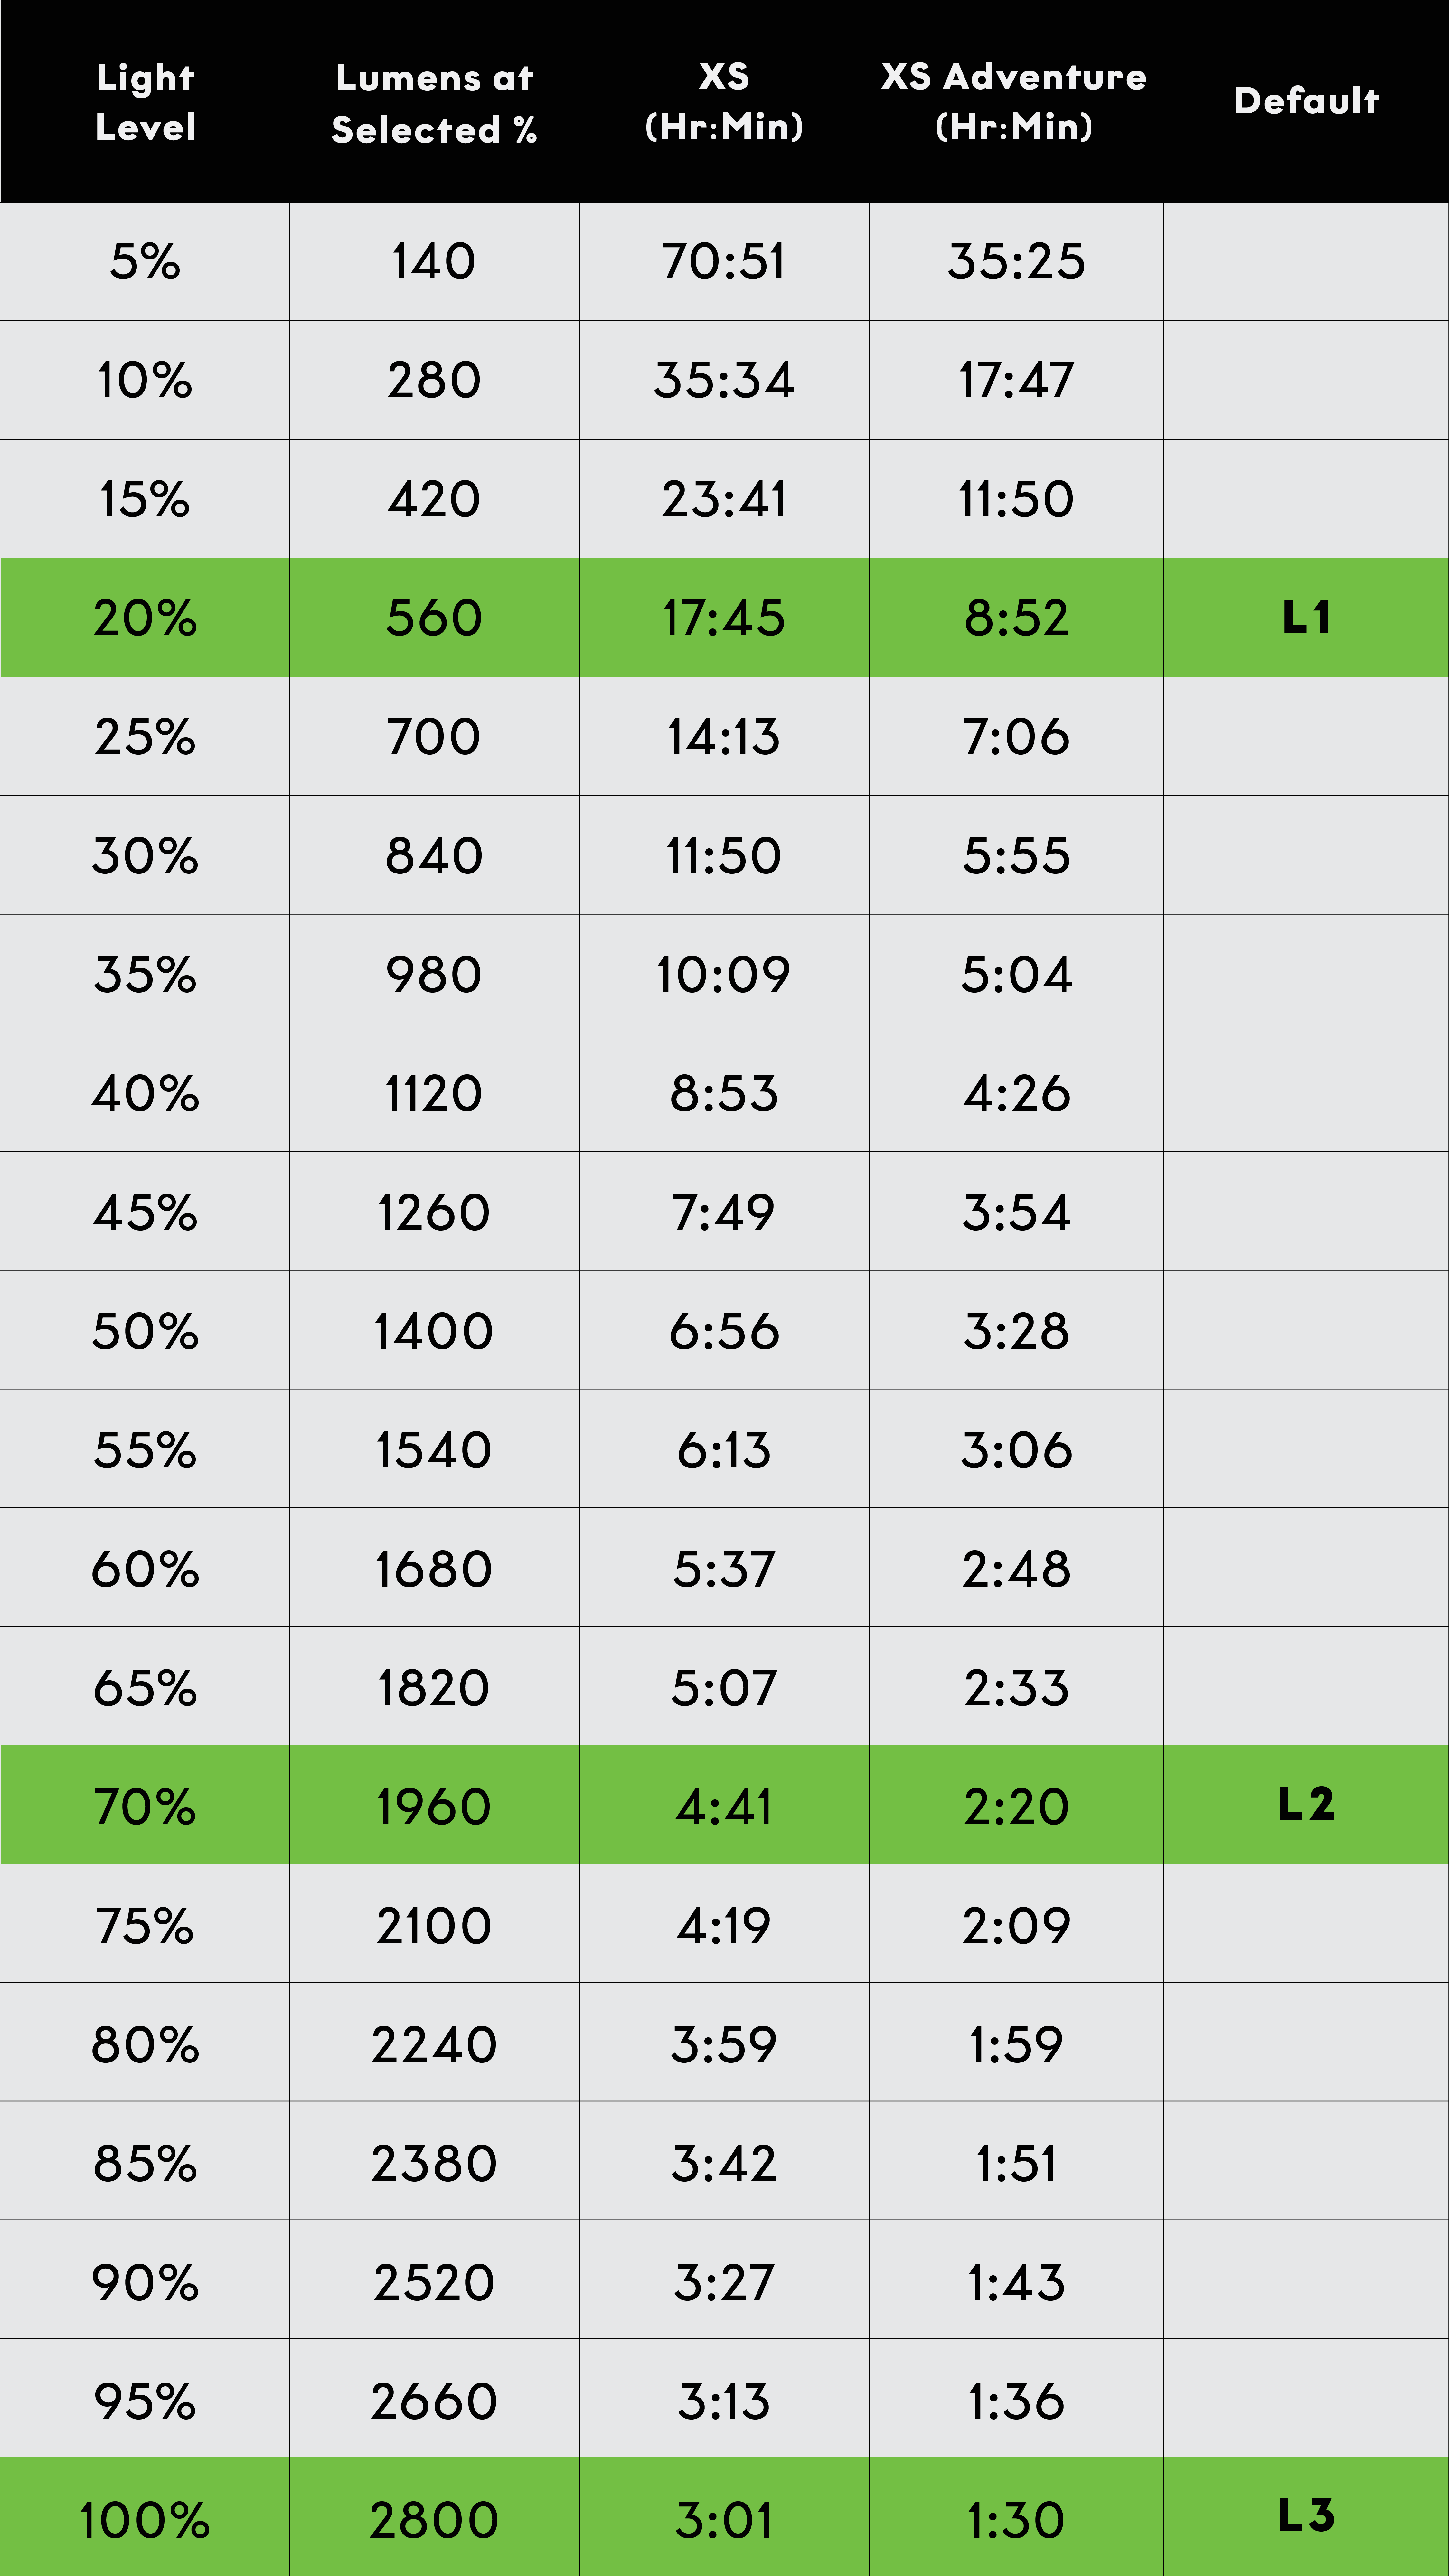
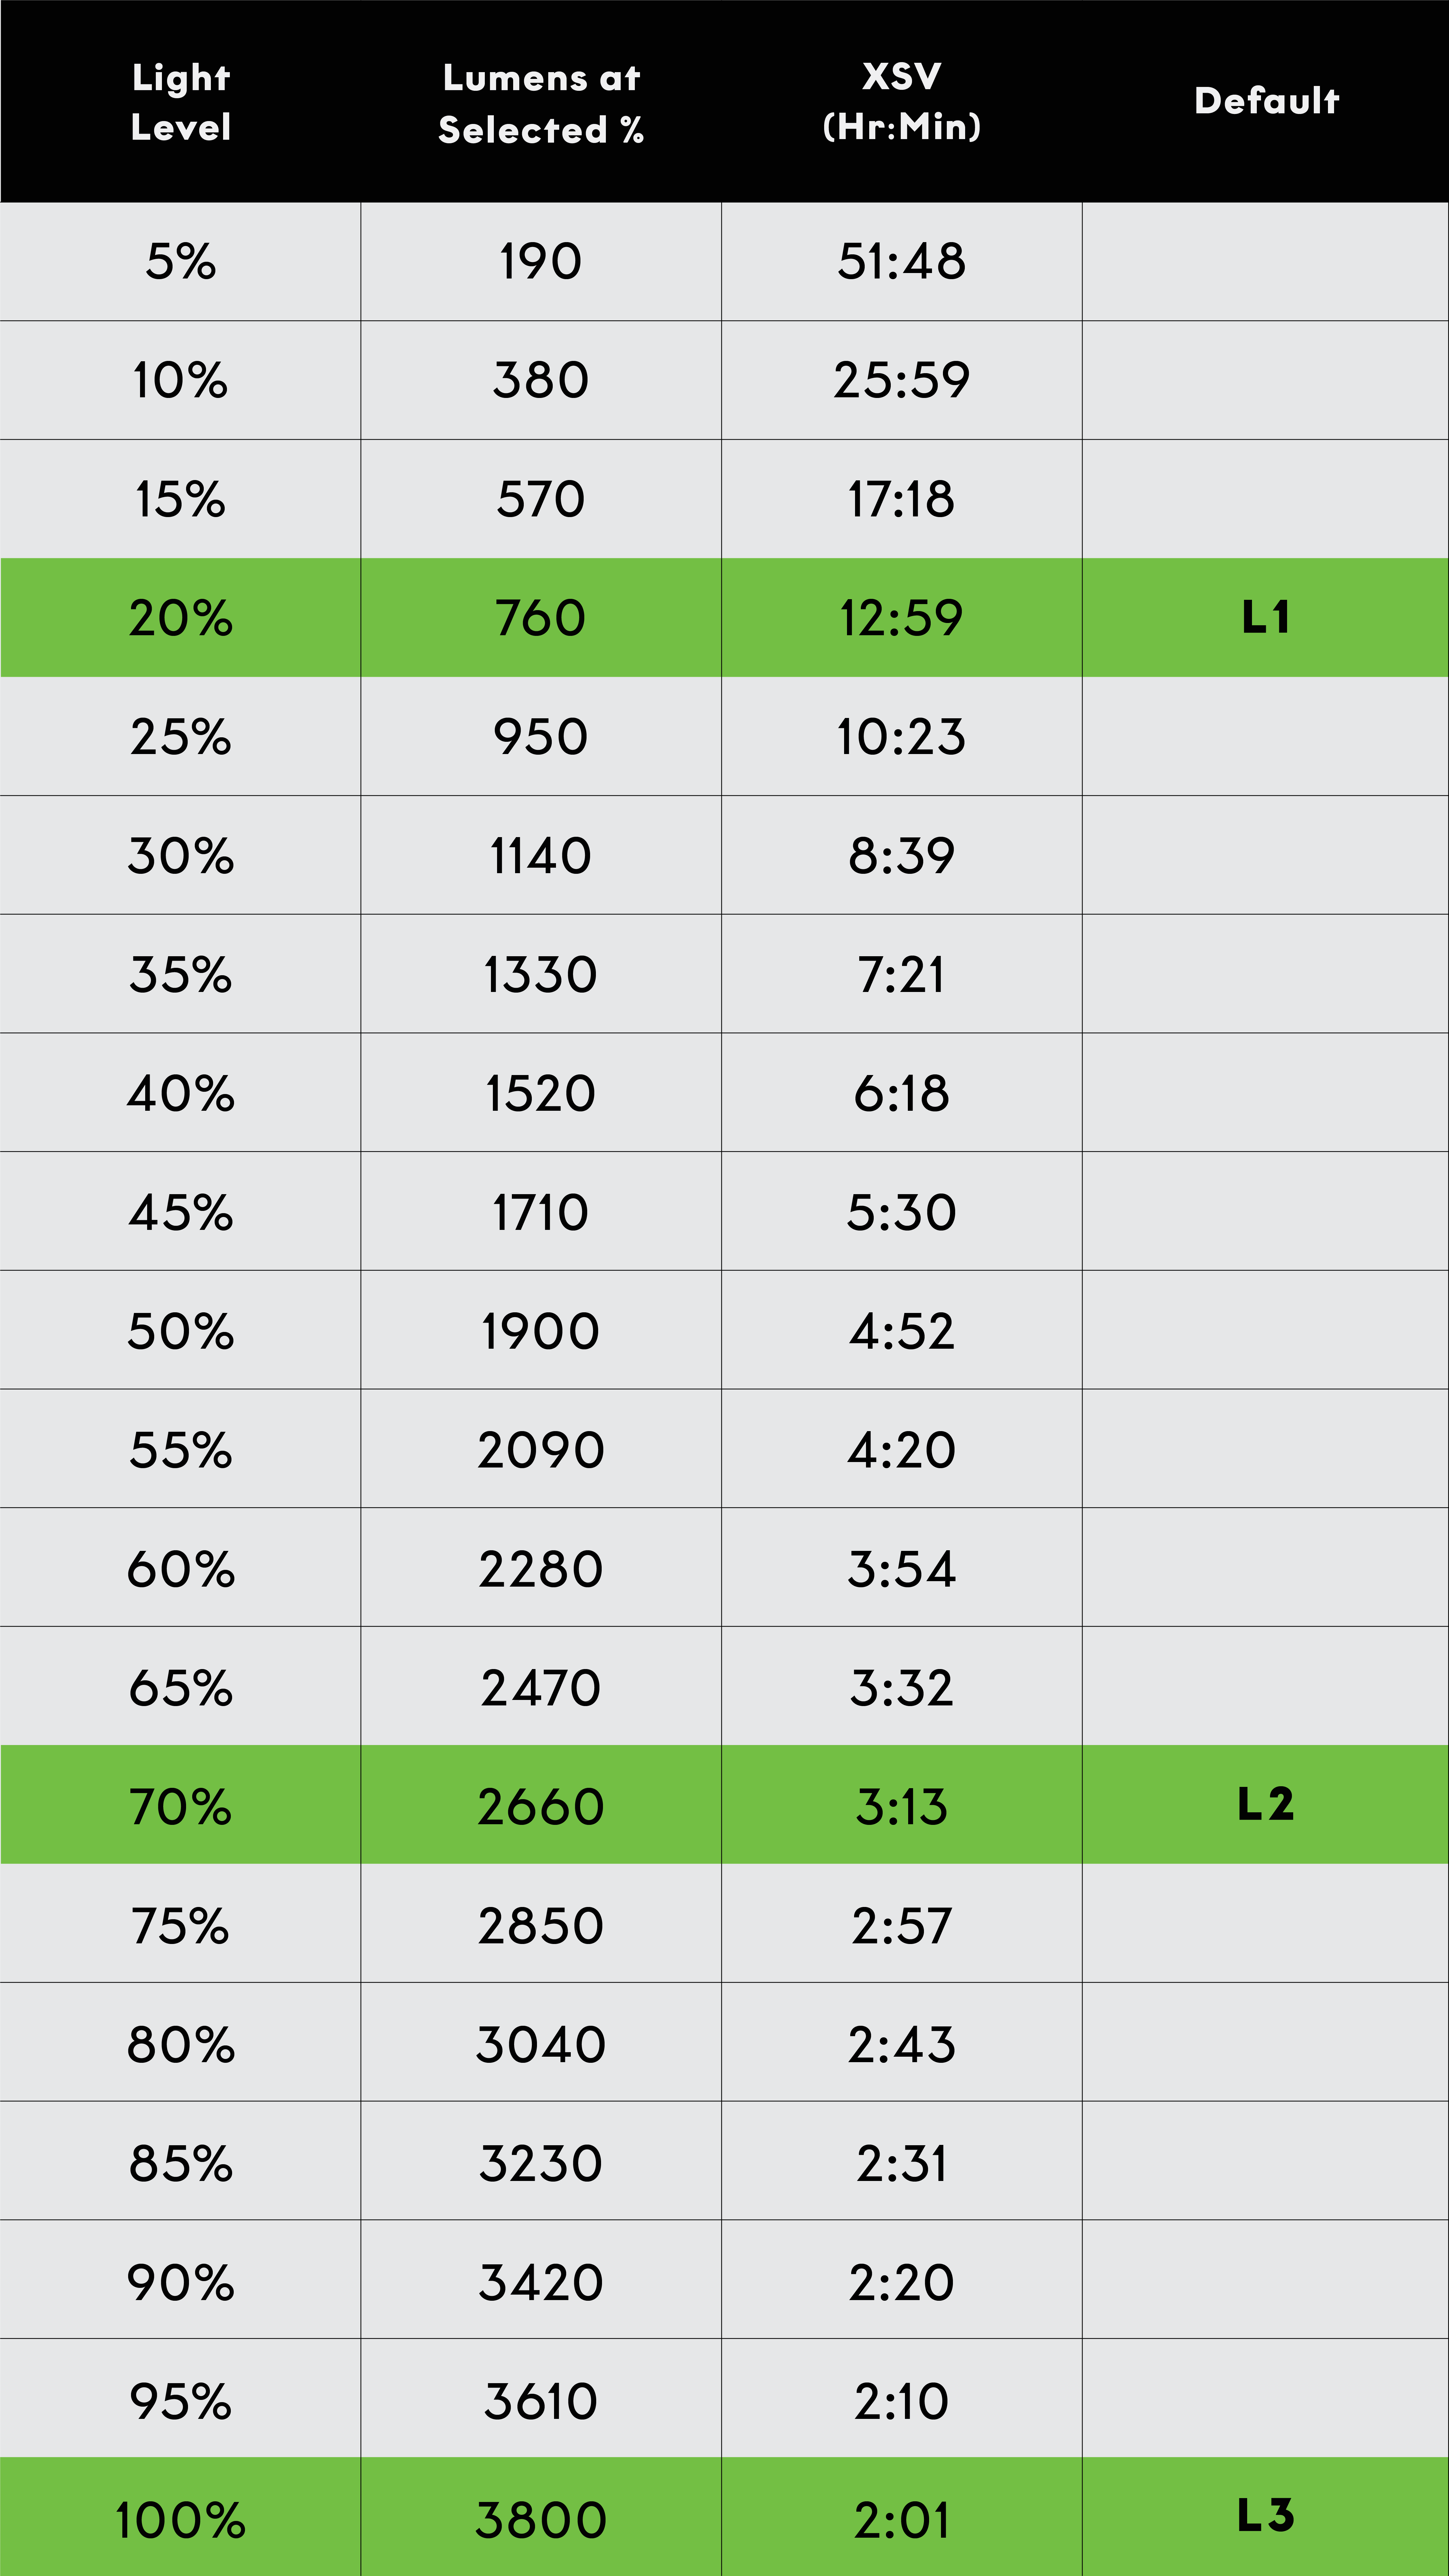
The default light levels are Level 1 (20%) | Level 2 (70%) | Level 3 (100%). Plus a FLASH function (Special Mode)
CONNECT LIGHT TO POWER PACK >> Button on light will glow red, yellow green, then blue. This indicates the light is ready to use. It is also the moment when a TX Remote could be paired.
TURN ON THE LIGHT >> Click the button once
CYCLE THROUGH LIGHT LEVELS >> A click of the button will change from Level 1 to Level 2 and another click will change to Level 3. A further click will return the light to the Level 1.
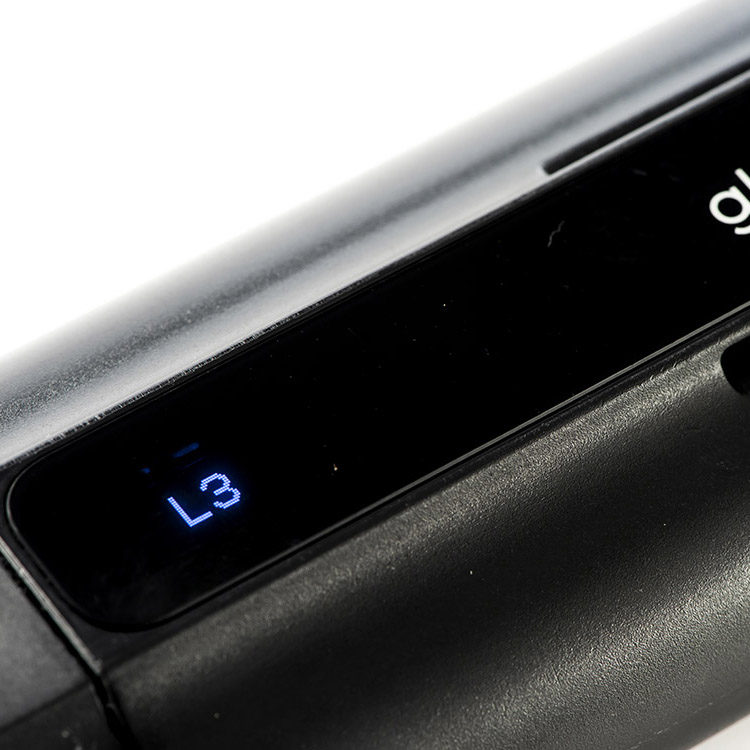
NOTE - As the light is cycled through light levels, the Power Pack OLED will display the selected the level (L1, L2, L3 etc).
ACCESS SPECIAL MODE (FLASH FUNCTION) >> Double click the button when the light is off. A click of the button when using the flash function will change the light to Level 1.
TURN OFF THE LIGHT >> When the light is on, hold the button down for about 2-3 seconds.
Note - Exact light levels will be dependent on any light level customisation that may have occurred.
If a light requires a firmware updating it will be advertised when paired to the Gloworm Link mobile app. Firmware updates are made via Bluetooth and full instructions will be given via Gloworm Link. The button on the back of the light will glow PURPLE when updating firmware.
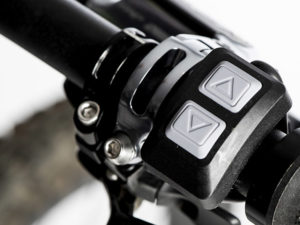
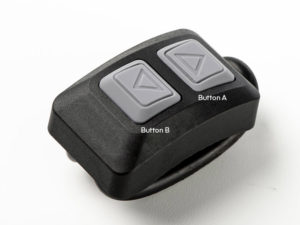
>> The TX (BT) is a Bluetooth remote that can be used to operate any Gloworm G2.0 Light. A TX (BT) can be identified by the grey buttons, as opposed to black buttons of the TX (RF).
>> The TX (BT) can operate a light from a range of up to 5m (line of sight). However it cannot be used to programme a light. NOTE Programming the Gloworm G2.0 Light can only be completed using the Gloworm Link mobile app.
>> The TX (BT) is designed to be mounted on the narrow part of a handlebar (22.2mm diameter), in a position easily accessible whilst riding.
The TX features 2 buttons - Button A and Button B. The TX can control individual and groups of lights using one or both buttons either independently or syncronised (linked).
>> The TX is powered by a CR2032 button cell battery that can be replaced by removing the 4 small screws on the underside of the TX unit.
NOTE The TX (BT) uses Bluetooth (BT) to control a light unit. BT signals can be affected/degraded by other devices transmitting an EMF (electromagnetic field). Such devices include but are not limited to: Other lights, wireless bike computers, ANT+ devices, bluetooth devices. Degradation of signal can vary, so be sure to check the TX pairing and control ability before use. A usual sign that a TX has been affected by EMF is that an occasionally a button click will be unresponsive and have no affect on the light. Usually a subsequent click of the button will have the desired affect.
>> The TX can control one light or multiple lights in any combination.
>> The TX has 2 buttons, A and B. In SINGLE BUTTON MODE, one light is paired to one button, either A or B. Control of the light is exclusive to the paired button.
>> Multiple lights can be paired to the same button, resulting in lights operating simultaneously.
>> Buttons A and B can be paired to different lights, providing independent control of each light or lights.
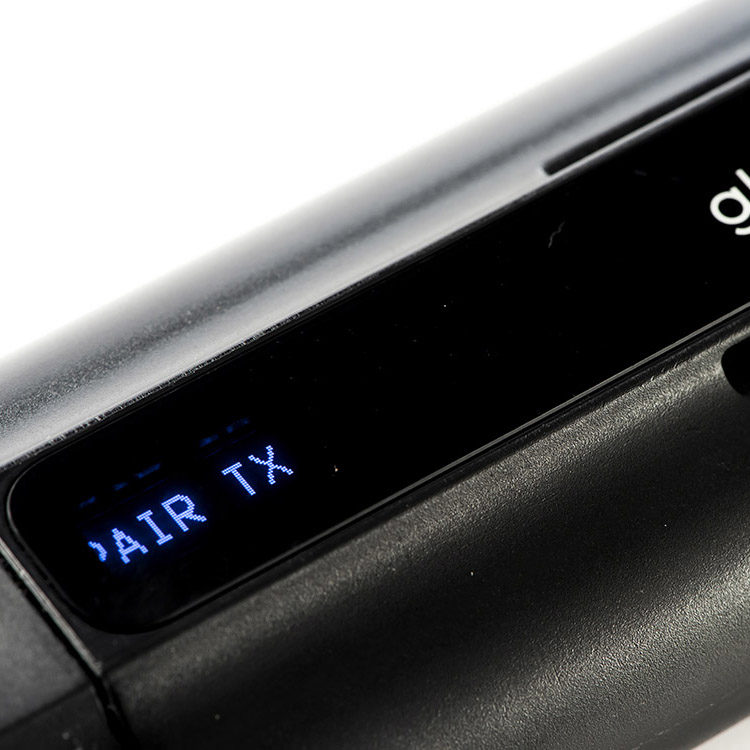
>> Pairing of the TX can occur within 15 seconds of connecting a Power Pack to a light. The Power Pack OLED display will show 'PAIR TX' and the button on the light will glow blue.
>> Subsequent lights can be added to an already paired button using the above Pairing Process. To synchronise the added light unit, press and hold the paired button until all lights are powered off - they are now syncronised.
>> A pair can only be broken by disconnecting the battery from the paired light.
NOTE - A light/multiple lights can only be paired to one button on one remote at any time.
>> The TX can also be configured to control a light or lights using button A to increase light levels and button B to decrease light levels. This is called
DUAL BUTTON MODE. i.e. At Level 1, button A can be clicked to increase to Level 2, then to Level 3. Button B must then be used to decrease the light level to Level 2 and back to Level 1.
NOTE - If two or more lights are going to be syncronised, it is recommended that all lights are programmed with the same number of light levels. If light levels differ the lights will cycle at the same time but will not be in-sync.
>> Connect Power Pack to Light using Power Cable (or multiples if you wish to connect to the same button).
>> Button on light will glow red, yellow, green and blue. The OLED dsiplay on Power Pack will show PAIR TX.
The pairing window will remain open for 15 seconds.
>> Click the TX (BT) remote button you wish to use.
>> Light will flash ONCE, indicating the successful pair.
>> You can now control your light/s using the selected button.
NOTE - Repeat the process to connect additional lights to the same button.
>> In Single Button Mode the TX will control the paired light/s using one selected button.
TURN ON THE LIGHT >> Click the button once
CYCLE THROUGH LIGHT LEVELS >> A click of the button will change from Level 1 to Level 2 and another click will change to Level 3. A further click will return the light to the Level 1.
ACCESS FLASH FUNCTION >> Double click the button when the light is off. A click of the button when using the flash function will change the light to LOW.
TURN OFF THE LIGHT >> When the light is on, hold the button down for about 2-3 seconds.
NOTE Exact light levels will be dependent on any light level customisation that may have occurred.
>> In Dual Button Mode the TX will control the paired light/s using both buttons. Button A to move up through light levels, Button B to move down through light levels.
CHANGE TO/FROM DUAL BUTTON MODE >> With the remote paired and light ON, hold down Button A, then at the same time, double click Button B. The light will flash once indicating the change.
At the time of changing to Dual Button Mode, lights paired to Button A and B will become syncronised.
NOTE - It is recommended that syncronised lights are programmed with the same number of light levels. If light levels differ the lights will cycle at the same time but will not be in-sync.
TURN ON THE LIGHT >> Click either button once
CHANGE LIGHT LEVELS >> A click of Button A will change from Level 1 to Level 2, another click will change to Level 3. A further click will return the light/s to Level 1.
ACCESS FLASH FUNCTION >> Double click either button when the light is off. A click of the button when using the flash function will change the light/s to Level 1.
TURN OFF THE LIGHT >> When the light is on, hold the button down for about 2-3 seconds.
Gloworm Power Packs are lithium-ion powered battery packs designed to be fast charged using a Gloworm USB-PD (Power Delivery) charger. A 20W charger is included in each G2.0 light set and a 45W charger is available as an aftermarket accessory.
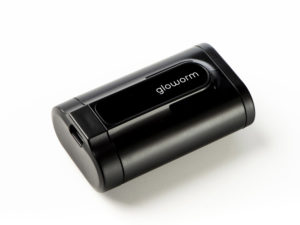
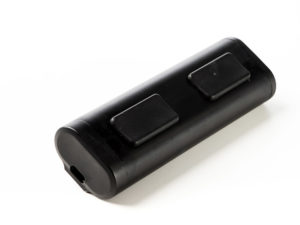
Each Power Pack features a single USB-C port and an OLED display. The USB-C port is used with a Gloworm Power Cable to power any G2.0 light (it is also used for charging the Power Pack), whilst the OLED display provides relevant information to the user. The Power Pack can also be used as a Power Bank to charge other devices.
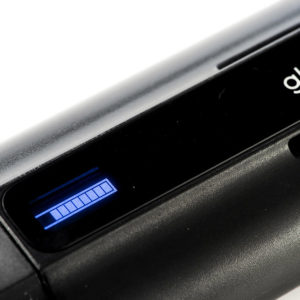
Power Pack charge can be tested at any time by tipping the battery on its end (non-connector end) for about 3-4 seconds. This will activate the OLED screen to show the battery charge graphic. The OLED display will turn off after 30 seconds.
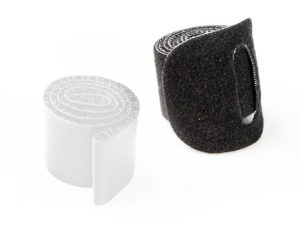
Silicone frame bumpers are included on each Power Pack to avoid any damage whilst mounted on frame or helmet. The Power Pack can be mounted using the included battery velcro. The velcro can be cut to size depending on the mounting location - Bar, helmet or headstrap.
The Power Pack casing is made from poly carbonate, making it very durable and resistant to breaking.
Specification Summary
>> Capacity Power Pack 5 - 5Ahr (8.4v)
>> Capacity Power Pack 10 - 10Ahr (8.4v)
>> Dimensions Power Pack 5 - H x W x D: 31 x 50 x 85mm | 200g
>> Dimensions Power Pack 10 - H x W x D: 31 x 50 x 156mm | 366g
>> Connector - USB-C (Custom connector)
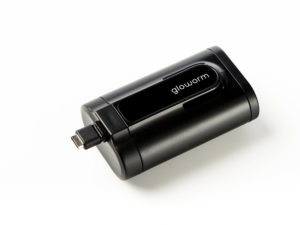
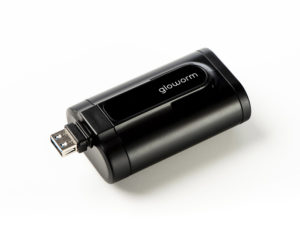
>> Adapter included for USB C (enable use of 3rd party cables) and USB Type A
>> Charger - 20W included, 45W aftermarket accessory
>> Drop Tested - 3 metres to concrete
>> OLED Display
>> Frame protection/velcro included
>> Input - Any USB C (Device will manage input autonomously to a max of 30W)
>> Power bank function
>> Output to Gloworm Light - 30W max
>> Output to third-party device - 18W max
The following steps should be taken to conserve the life of your Power Pack
>> Always store your Power Pack in a cool dry location.
>> Prior to long term storage, ensure your Power Pack is charged to appx 70% (not full).
>> You can charge and discharge your Power Pack as often as you like.
>> Keep your Power Pack away from direct heat sources
>> A Power Pack should be able to complete 500 cycles before losing capacity.
>> One full cycle consists of a complete discharge and complete charge. Part charges and discharges are not equal to a full cycle.
>> Several part cycles are better for the battery than 1 ‘full’ cycle.
For more information on your battery go to www.batteryuniversity.com
POOR BATTERY CARE WILL VOID WARRANTY
To charge a Power Pack:
>> First, remove the o-ring from the 90 degree connector of the Power Cable and connect to the charger, then connect the straight plug to the Power Pack.
>> The OLED display will show a battery charge graphic. The graphic will be animated during the charge process.
>> When fully charged the battery graphic will remain on until the charger is disconnected.
>> Disconnect the Power Cable from the charger, reinstall the oring on the 90 degree connector, and plug into the light.
Charge Times - assuming zero charge
>> Power Pack 5
> Gloworm 20W Charger - 2 hrs 40min
> Gloworm 45W Charger - 1hr 45min
>> Power Pack 10
> Gloworm 20W Charger - 5hrs 15min
> Gloworm 45W Charger - 3hr 30min
NOTE - A third party USB-C charger can be used to charge a Power Pack. However, due to charging inconsistencies, specific charge times cannot be predicted. Even though there is no danger in doing so, Gloworm will not be held responsible for any damages caused as a result of using a third party charger.
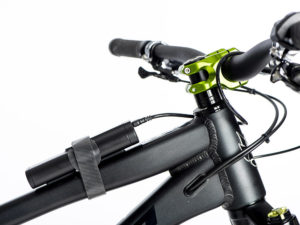
>> A Gloworm Power Pack can easily be mounted on the frame of your bike, helmet or dropped into your pack or pocket.
>> Each power pack has integrated fame protection and a velcro slot for secure mounting.
>> The supplied velcro is 50cm long and can be cut to length. We recommend when mounting to a frame that the velcro is wrapped multiple times for ultimate security.
The Power Bank OLED screen will display information about battery and light performance and function during use and when charging.
>> BATTERY CHARGE GRAPHIC
Displays a digital image of a battery illustrating the level of charge in 10% increments. The graphic shows when: Power Pack is being charged (animated); being used by a third party device; when light is disconnected from Power Pack or if activated when not connected to another device (To activate: Place the Power Pack on the non-connector end for about 3 seconds. The OLED will turn off after 30 seconds).
>> RUNTIME DISPLAY
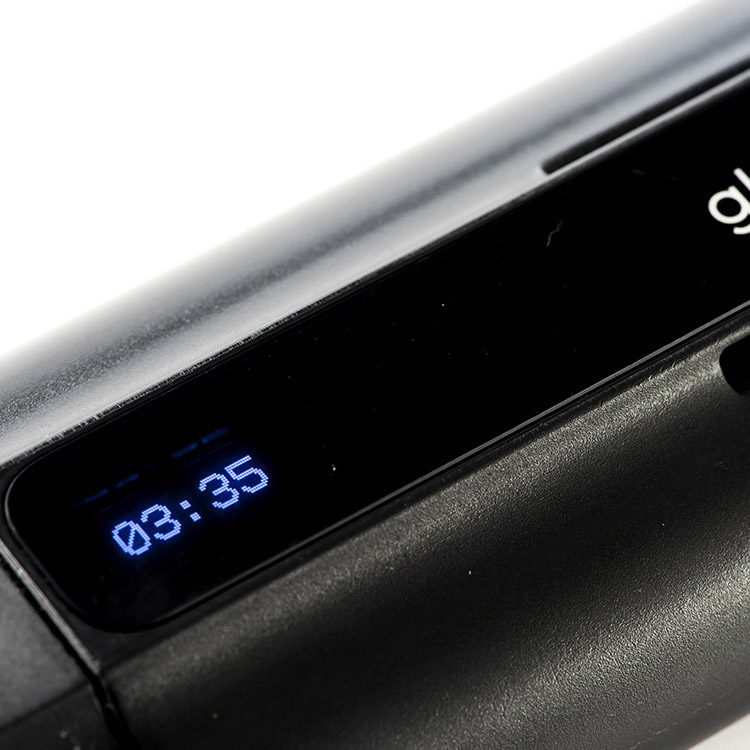
When a Power Pack is connected to a light and the light is on, the remaining runtime will be displayed in hours and minutes (00:00). Runtime will change when light level is changed.
>> 'PAIR TX'
The OLED will display 'PAIR TX' when the connected light is ready to be paired with a TX remote. Display will turn off after 15 seconds.
>> 'PHONE'
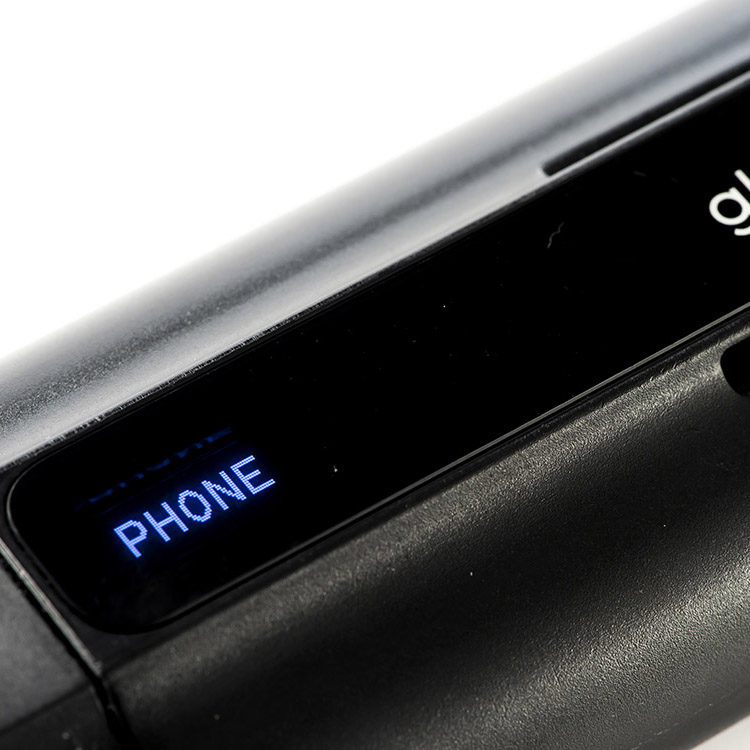
When PHONE shows the Light System is ready to be paired to Gloworm Link mobile app.
>> 'L1', 'L2', 'L3' etc
When a light level change is made it will be indicated briefly using this abbreviated format.
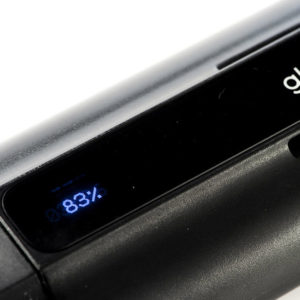
>> '52%', '81%', '39%' etc
Following a light level change (and the light level abbreviation on the OLED) the percentage of battery charge will show before returning to the runtime display.
>> 'S MODE'
S MODE will display briefly when light enters Special Mode.
>> Power Packs can be used as a power bank to power and charge third party devices at a rate of up to 18W.
>> When charging a 3rd party device that supports USB PD, the Power Pack OLED display will show time remaining on the current battery charge. If the device does not support USD PD then the battery graphic, indicating the amount of charge remaining, will show.
NOTE Due to the nature of USB and the variety of available devices, we are unable to determine how fast a 3rd party device will charge. However, if a device can be charged using USB, the Gloworm Power Pack will be able to charge it.
>> Each Gloworm G2.0 light set is supplied with two USB adapters - USB-C and USB Type A. The USB adapters enable the use of a third party cable when charging 3rd party devices.
NOTE Failing to remove a third party cable/adapter after use will result in continued (slow) battery drain.
If Power Pack firmware requires updating it will be advertised when a connected light is paired to the Gloworm Link mobile app. Firmware updates are made via Bluetooth and full instructions will be given via Gloworm Link. The OLED display will show UPDATE when updating firmware.
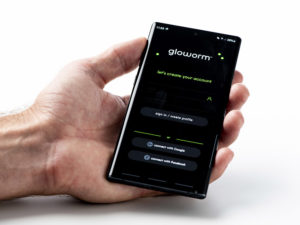
The Gloworm Link mobile app gives you complete control to customise your Gloworm G2.0 light.
Gloworm Link can be found in Google Play or the Apple App Store.
Within the app, you can make adjustments to light levels and see further info about your light and battery:
>> Set the number of light levels. Min 1 level, Max 4 levels
>> Choose if a light level will be a fixed beam or a flash pattern
>> Select one of 3 flash patterns or set the brightness (from 1% to 100%)
>> See how much runtime you will have on a full battery at any given level
>> Observe battery information in real time
>> Create profiles specific to riding locations or those using the light
>> Rename your light
Click below for a quick demonstration on how the Gloworm Link App operates when customising your light.
Click below to view the various app screens in the form of a video
The provided tables give an accurate representation of light runtime based on specific conditions. They are a very good approximation. If you intend to rely on runtime data, it is recommended that runtime tests are done in your specific riding location.
To return the light to the factory default settings, follow the process below:
>>Disconnect the light from the Power Pack
>>Hold the power button on the back of the light
>>Whilst holding the button, connect the light to the Power Pack
>>Continue to hold the button for about 10 seconds
>>Release the button when it glows purple.
>>When stops glowing purple, the light will be reset (This may take up to 2 min)
Video Guides - G2.0 Gloworm Lights
User Guides - G1.0 Gloworm Lights
The following User Guides are specific for the G1.0 range of products (Designed previous to 2021):
Basic Instructions – All Light Sets
Light and Battery Mounting – All Light Sets
TX (Wireless Remote) Instructions – Gloworm X2, X2 Adventure, XS, XSV
Advanced Operation and Programming – All Light Sets
Battery Care, Indication and Charging – All Light Sets
Runtime/Lumen Matrix – All Light Sets
Video Guides - G1.0 Gloworm Lights
Instruction Archive
Archived User Guides
Pre 2018 CX Trail 1300 Lumen Instructions
Pre 2018 CX Urban 900 Lumen Instructions
Pre 2018 X1 900 Lumen Instructions
Pre 2018 X2 1500 Lumen Instructions
Pre 2018 X2 Adventure 1500 Lumen Instructions
Pre 2018 XS 2200 Lumen Intructions
Pre 2018 XS 2500 Lumen Instructions


